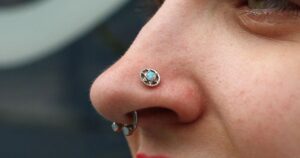
Nose piercing is a form of body modification where a small hole is made in the nose to insert jewelry. It’s a cultural and fashion statement practiced worldwide for centuries. Piercings can be placed on different parts of the nose, such as the nostril or septum. Careful aftercare is essential to prevent infections and promote healing.
Are you considering switching your nose piercing from a stud to a ring? Dive into our comprehensive guide for everything you need to know! From the process of changing jewelry to essential aftercare tips, we’ve got you covered. Don’t miss out on this valuable resource for a smooth transition and a stunning new look.
Changing your nose piercing from a stud to a ring involves swapping out the jewelry for a different style. It’s important to follow proper techniques to avoid irritation or infection. This comprehensive guide provides essential tips and steps for a successful transition.
When to Change Your Nose Piercing?
Knowing when to change your nose piercing is crucial for proper healing and preventing complications. Typically, it’s recommended to wait at least 6-8 weeks after the initial piercing before considering a change. This allows sufficient time for the piercing to heal and reduces the risk of irritation or infection. However, everyone’s healing process varies, so it’s essential to monitor your piercing for signs of readiness, such as reduced tenderness and minimal discharge.
Additionally, if you’re experiencing discomfort or irritation with your current jewelry, it might be time for a change. Swapping to a different style or material could alleviate issues and promote better healing. Always consult with a professional piercer for guidance and ensure you have clean, sterilized jewelry before making any changes to your nose piercing.
Choose the right style of jewelry for your lifestyle
Choosing the right style of jewelry for your lifestyle is essential for comfort and practicality. Whether you lead an active lifestyle or prefer a more minimalist approach, there’s a wide range of options to suit your needs. Consider factors such as material, size, and design to ensure your jewelry complements your daily activities and personal style. By selecting the perfect pieces, you can effortlessly showcase your individuality while staying comfortable and confident throughout the day.
At Pierced, we offer
- Nostril Nails
- Seam Rings
- Captive Bead Rings
- Clickers
1. Consider your daily activities: Opt for jewelry that won’t hinder your movements or cause discomfort during activities like sports or work.
2. Choose hypoallergenic materials: If you have sensitive skin, opt for jewelry made from hypoallergenic materials like titanium or surgical stainless steel to minimize the risk of irritation.
3. Match your personal style: Select jewelry that reflects your unique taste and complements your wardrobe, whether you prefer classic elegance or bold statement pieces.
4. Prioritize safety: Ensure that your chosen jewelry is securely fastened and won’t easily snag on clothing or other objects to prevent accidents or injury.
Step-by-Step Guide to Changing Your Nose Piercing
Gather the Right Tools and Materials
Gathering the right tools and materials is crucial for any task, including changing your nose piercing. You’ll need a clean, flat surface to work on, preferably covered with a sterile cloth or paper towel. Additionally, prepare a pair of sterile gloves to maintain hygiene throughout the process. Ensure you have a new nose ring or stud ready, preferably made of surgical-grade stainless steel or another hypoallergenic material to prevent irritation.
It’s also helpful to have some saline solution or piercing aftercare solution on hand for cleaning the area before and after the jewelry change. Taking the time to gather these essentials beforehand will make the process smoother and safer, ensuring a successful transition for your nose piercing.
Sterilization and Hygiene
| Sterilization and Hygiene | Description |
| Clean, flat surface | A sterile area to work on, covered with a cloth or paper towel. |
| Sterile gloves | Disposable gloves to maintain hygiene and prevent contamination. |
| Surgical-grade jewelry | Nose rings or studs made of hypoallergenic materials to avoid irritation. |
| Saline solution or aftercare | Solution to clean the piercing area before and after the jewelry change. |
| Cotton swabs or pads | Used for applying saline solution and cleaning around the piercing. |
This table outlines the essential items for sterilization and hygiene during the nose piercing process.
Cleaning and Preparing the Area
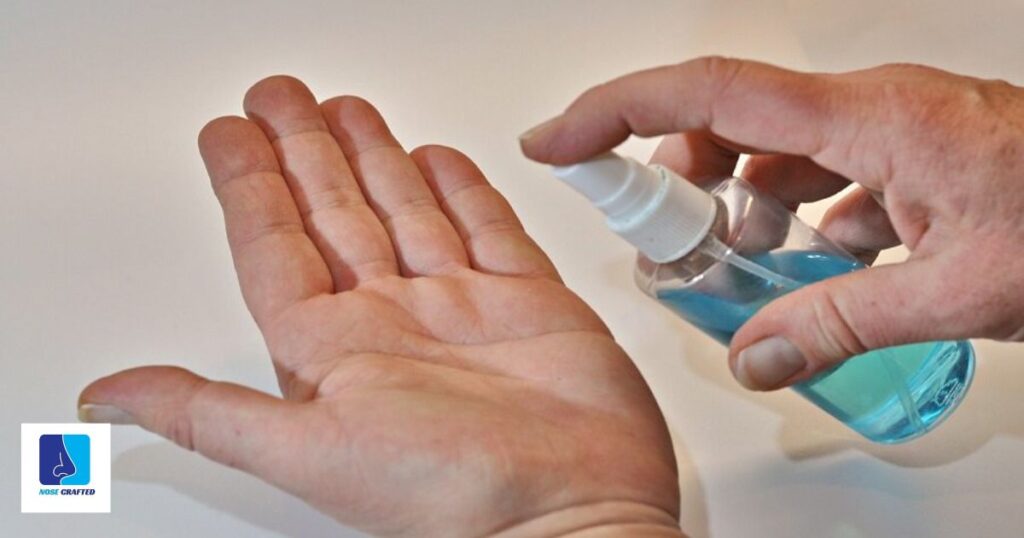
Cleaning and preparing the area before changing your nose piercing jewelry is crucial for a smooth process and to minimize the risk of infection. Begin by washing your hands thoroughly with soap and water to ensure they’re clean before touching your piercing. Next, gently clean the area around the piercing with a saline solution or warm water to remove any dirt or bacteria. Avoid using harsh chemicals or alcohol-based products, as they can irritate the skin.
Once the area is clean, prepare the new jewelry by soaking it in a saline solution or cleaning solution recommended for piercings. Ensure that the jewelry is completely dry before attempting to insert it into your nose piercing. Taking these simple steps to clean and prepare the area can help ensure a comfortable and hygienic process when changing your nose piercing jewelry.
Removing the Stud
Removing the stud from your nose piercing is a simple process but requires caution. First, ensure your hands are clean to avoid introducing bacteria. Gently twist the stud in a clockwise direction to loosen it from the piercing. If there’s resistance, don’t force it; instead, soak the area with saline solution to soften any crust or buildup. Once loosened, carefully slide the stud out of the piercing hole, taking care not to cause any discomfort or injury.
After removing the stud, cleanse the area with a saline solution to prevent infection and promote healing. Use a cotton swab to gently dab around the piercing, removing any debris. If you experience any redness, swelling, or pain, apply a cold compress to reduce inflammation. It’s essential to keep the piercing clean and dry while allowing it to breathe before deciding on the next jewelry option.
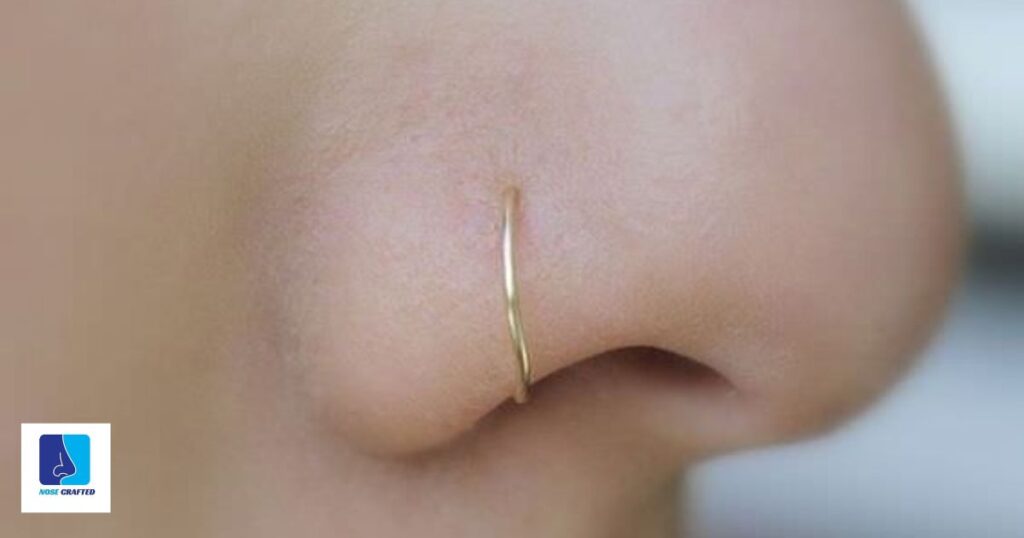
Inserting the Ring
1. Choose the Right Size: Select a nose ring that matches the gauge and diameter of your piercing to ensure a comfortable fit.
2. Wash Your Hands: Before handling the nose ring, thoroughly wash your hands with soap and water to minimize the risk of infection.
3. Prepare the Ring: If the ring has a ball closure, make sure the ball is securely in place. If it’s a seamless ring, ensure it’s properly aligned for insertion.
4. Lubricate if Necessary: If the ring is tight or if you’re experiencing difficulty inserting it, apply a small amount of water-based lubricant to the area.
5. Positioning: Hold the ring between your thumb and forefinger, positioning it at the entrance of the piercing hole.
6. Insertion: Gently guide the ring into the piercing hole, applying light pressure and maintaining a steady hand to avoid discomfort.
7. Secure the Closure: If the ring has a ball closure, carefully snap the ball into place once the ring is fully inserted. Ensure it’s securely fastened to prevent the ring from coming loose.
Securing the Ring
| Steps for Securing the Ring |
| 1. Hold the ring steady with one hand, ensuring it’s positioned correctly within the piercing hole. |
| 2. With your other hand, grasp the closure mechanism (e.g., ball closure or hinge) firmly. |
| 3. Align the closure with the open end of the ring, ensuring it’s poised to close securely. |
| 4. Apply gentle pressure to the closure, either snapping the ball into place or closing the hinge, depending on the ring type. |
| 5. Confirm that the closure is fully secured, checking for any gaps or looseness in the ring. |
| 6. If necessary, adjust the closure to ensure it’s snug but not too tight to cause discomfort. |
| 7. Once satisfied with the positioning and security of the ring, refrain from excessive touching to allow the piercing to heal properly. |
Aftercare and Maintenance
Cleaning the Piercing
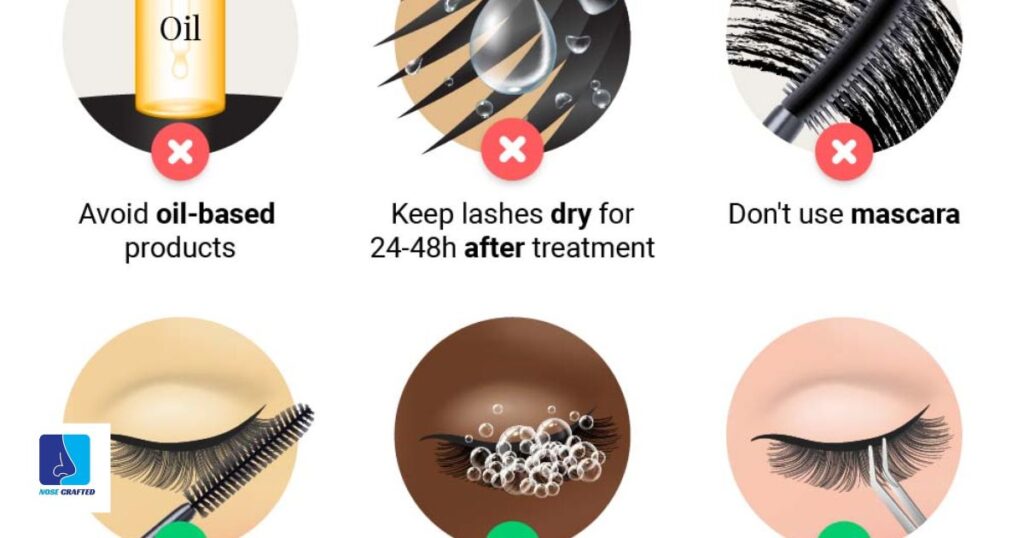
Ensuring proper care for your new nose piercing is essential in preventing infections and fostering a speedy healing process. Twice a day, delicately cleanse the area around the piercing using a saline solution or a mild antibacterial soap. Steer clear of harsh chemicals or alcohol-based products, as they may cause irritation to the skin. Remember, gentle cleaning is key to preventing trauma to the piercing site. If you’re concerned about nose piercing too early, following these care instructions diligently will contribute to a healthier healing journey.
After cleaning, pat the area dry with a clean paper towel or let it air dry. Avoid using towels or cotton balls that may leave fibers behind. It’s essential to keep the piercing clean throughout the healing process, which can take several weeks to months depending on the location and type of piercing. Regular cleaning and proper care will help ensure your piercing heals properly and looks great.
Healing and Adjusting to the New Jewelry
After changing your nose piercing jewelry, it’s crucial to allow time for proper healing and adjustment. Give your piercing some extra care during this period to prevent any complications. Avoid touching or rotating the jewelry excessively to minimize irritation and promote healing.
As your nose adjusts to the new jewelry, you may experience slight discomfort or sensitivity. This is normal and should subside gradually as your piercing settles. Be patient and gentle with your nose during this phase, and follow any aftercare instructions provided to ensure a smooth transition and optimal healing.
Common Concerns and Troubleshooting

Irritation and Swelling
Irritation and swelling are common reactions that the body may exhibit in response to various factors. When it comes to body piercings, these reactions can occur around the piercing site due to trauma, infection, or an allergic reaction to the jewelry material. It’s essential to keep the pierced area clean and avoid touching it excessively to minimize irritation. Additionally, using a saline solution or following aftercare instructions provided by a professional piercer can help reduce swelling and promote healing.
If irritation and swelling persist or worsen, it’s crucial to seek advice from a healthcare professional or a qualified piercer. They can assess the situation and provide appropriate treatment recommendations, which may include adjusting the jewelry or addressing any underlying issues causing the reaction. Remember, taking proactive steps to address irritation and swelling can help ensure a smooth and comfortable healing process for your piercing.
Infection and Discharge
| Symptom | Description |
| Infection | – Redness and swelling around the piercing site |
| – Increased pain or tenderness at the piercing site | |
| – Heat radiating from the pierced area | |
| – Pus or yellow/green discharge from the piercing | |
| – Fever or chills may indicate a systemic infection | |
| – Persistent discomfort or worsening of symptoms over time | |
| Discharge | – Clear or slightly white discharge is normal during healing |
| – Excessive or foul-smelling discharge may indicate infection | |
| – Discharge accompanied by redness, swelling, or pain | |
| – Discharge persisting beyond the initial healing period | |
| – Discharge that increases in volume or changes in color |
Remember, if you suspect you have an infection or unusual discharge from your piercing, it’s important to seek advice from a healthcare professional or a qualified piercer for proper evaluation and treatment.
Snagging and Catching on Clothing

Snagging and catching on clothing can be a common frustration, especially when wearing delicate fabrics or jewelry. Small hooks or protrusions on clothing, such as zippers, buttons, or rough edges, can easily catch onto threads or loops, leading to tears or damage. Additionally, jewelry with intricate designs or sharp edges may also snag on clothing fibers, posing a risk of pulling or tearing.
To prevent snagging and catching on clothing, consider opting for smoother fabrics and avoiding clothing with rough embellishments. When choosing jewelry, select pieces with rounded edges and minimal protrusions. Taking care when putting on or removing clothing and being mindful of jewelry placement can also help minimize the risk of snagging.
FAQ,s
Can I change nose stud to nose ring?
Yes, you can change a nose stud to a nose ring.
What do I need to know before getting a nose ring?
Before getting a nose ring, it’s important to research reputable piercing studios, consider the pain level, and be aware of aftercare requirements.
When you get your nose pierced can you get a hoop instead of a stud?
Yes, you can typically get a hoop instead of a stud when you get your nose pierced.
Why does my nose piercing bump after changing to a hoop?
Your nose piercing may bump after changing to a hoop due to irritation from the new jewelry shape or improper fitting.
Conclusion
In conclusion, nose piercings are not only a form of self-expression but also a significant cultural and fashion statement. Whether opting for a stud or a hoop, it’s crucial to understand the process of changing jewelry and the potential risks involved. From snagging on clothing to bumps and infections, proper care and attention are essential for maintaining a healthy and stylish piercing.
With the comprehensive guide provided, individuals can navigate the transition from a stud to a ring with confidence. By following the outlined tips and steps, such as selecting suitable jewelry and practicing careful aftercare, the process can be smooth and hassle-free. Ultimately, whether sticking with a classic stud or embracing the boldness of a hoop, nose piercings allow for endless possibilities in personal style and expression.