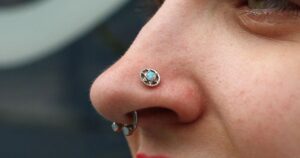
Piercing your own nose might seem daunting, but with the right knowledge and tools, it’s entirely possible to do it safely at home. Whether you’re seeking self-expression or simply curious about the process, learning how to pierce your nose can be empowering. In this guide, we’ll walk you through the steps, precautions, and aftercare to ensure a successful and safe experience.
Imagine the satisfaction of adorning yourself with a nose piercing that you’ve done with your own hands. It’s not just about the aesthetic; it’s about taking control of your body and embracing your unique style. So, let’s dive into the world of DIY nose piercing and unlock your inner artist.
Getting Started

Before you embark on this journey, gather all the necessary supplies. You’ll need a sterilized piercing needle, a nose ring or stud, rubbing alcohol or saline solution, gloves, marker, and a mirror. Ensure that your workspace is clean and well-lit to minimize the risk of infection.
Preparing Your Nose
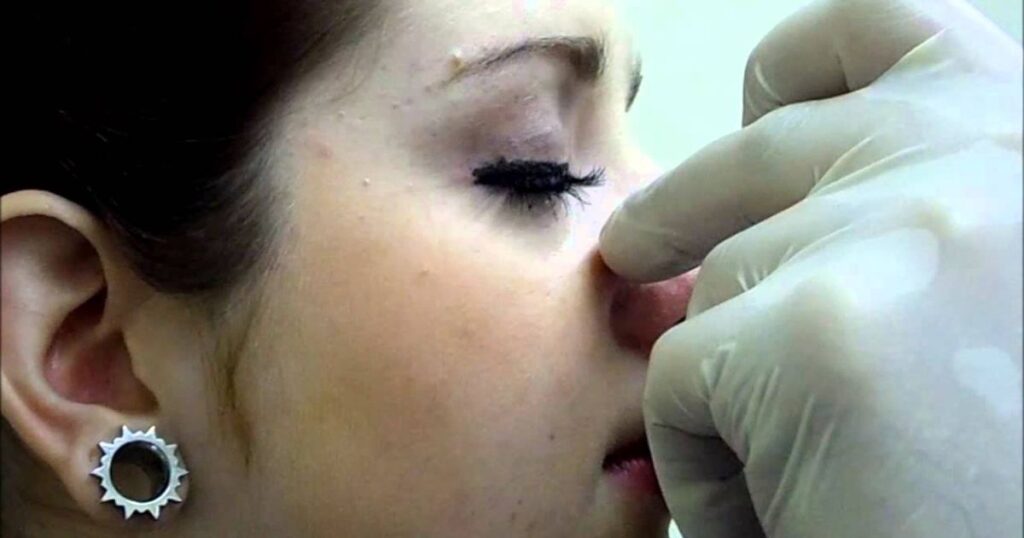
Wash your hands thoroughly and put on the gloves. Use the marker to mark the exact spot where you want to pierce your nose. Take your time with this step; precision is key. Once you’re satisfied with the placement, sanitize the area with rubbing alcohol or saline solution.
Numbing the Area
If you’re concerned about pain, you can use an over-the-counter numbing cream or ice to dull the sensation. Apply it to the marked spot and wait for it to take effect. This step is optional but can make the piercing process more comfortable, especially for beginners.
Piercing
Hold the sterilized needle firmly and take a deep breath to steady your nerves. With confidence and control, slowly push the needle through the marked spot on your nose. Expect some discomfort or a sharp pinch, but if you experience severe pain, stop immediately. Once the needle is through, quickly insert the nose ring or stud into the piercing. Be gentle but firm to avoid unnecessary trauma to the area.
Aftercare

Congratulations, you’ve successfully pierced your own nose! But the journey doesn’t end here; proper aftercare is crucial to prevent infection and promote healing.
Cleaning
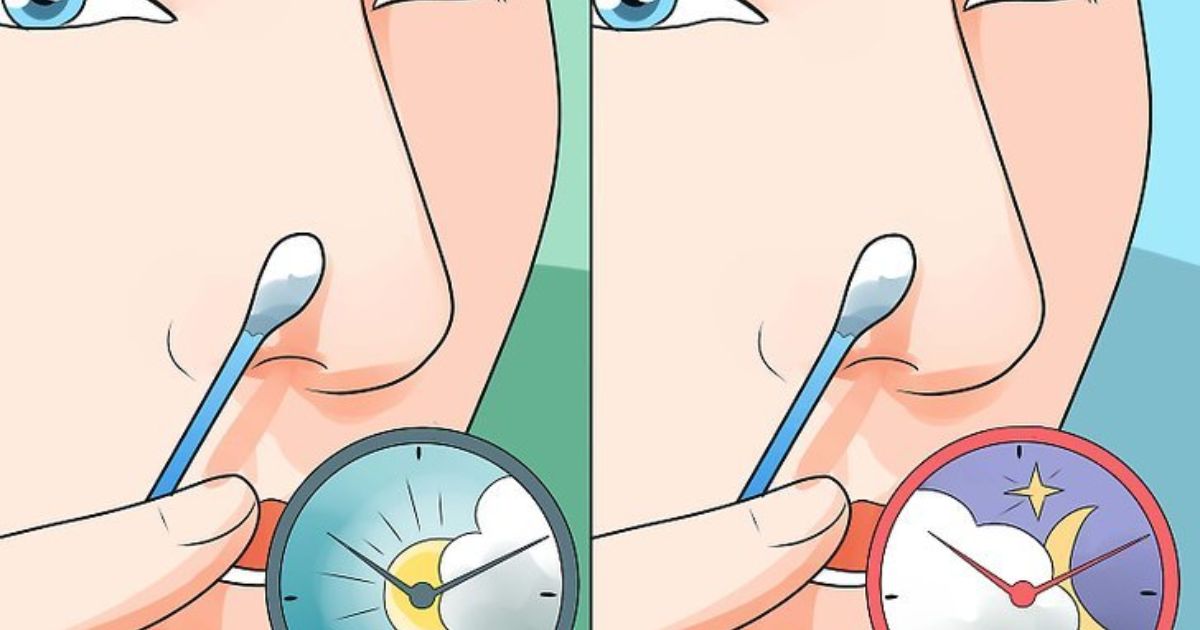
Cleanse the pierced area twice a day with a saline solution or a mild antibacterial soap. Gently rotate the nose ring or stud while cleaning to prevent it from sticking to the surrounding skin.
Avoiding Irritants
During the healing process, avoid touching your nose with unwashed hands or exposing it to harsh chemicals such as makeup or skincare products. Also, refrain from swimming in pools or hot tubs to prevent bacterial contamination.
Patience and Care
Healing time varies from person to person but typically takes around 6-8 weeks. Be patient and resist the urge to change or remove the jewelry prematurely. If you notice any signs of infection such as excessive swelling, redness, or discharge, consult a healthcare professional immediately.
Potential Risks and Complications

While piercing your own nose can be a rewarding experience, it’s not without risks. Infection, allergic reactions, and improper technique are all potential complications to be aware of. If you’re uncertain or uncomfortable with the process, consider seeking professional help from a licensed piercer, especially when it comes to delicate procedures like nose piercing at 14. This ensures a safer and more hygienic experience for you or your teenager.
Diy Nose Piercing Kit
- Sterilized Piercing Needle: A sharp, sterilized needle specifically designed for piercing, ensuring a clean and precise entry point.
- Nose Rings or Studs: A variety of nose rings or studs made from hypoallergenic materials such as surgical stainless steel or titanium, suitable for initial piercing and long-term wear.
- Rubbing Alcohol or Saline Solution: An antiseptic solution to sanitize the piercing area before and after the procedure, reducing the risk of infection.
- Gloves: Disposable gloves to maintain a sterile environment and prevent contamination during the piercing process.
- Marker: A fine-tip marker to accurately mark the spot on your nose where you intend to pierce, ensuring proper placement and alignment.
- Numbing Cream or Ice Pack: Optional but useful for numbing the area before piercing, minimizing discomfort during the procedure.
- Aftercare Instructions: A comprehensive guide on how to properly clean and care for your new nose piercing, including recommended cleaning solutions and healing timelines.
How To Pierce Your Nose Septum

Piercing your septum, the thin piece of skin between your nostrils, can seem daunting, but it’s possible with care. Here’s a simple guide: First, gather your supplies, including a sterilized needle, septum jewelry, rubbing alcohol, gloves, and a marker. Next, mark the spot where you want the piercing, then sanitize the area with rubbing alcohol. Take a deep breath, steady your hand, and carefully push the needle through the marked spot. Finally, insert the septum jewelry and clean the area regularly to prevent infection.
Remember, patience is key during the healing process. Avoid touching or playing with the piercing, and follow proper aftercare instructions. If you’re unsure or uncomfortable, it’s best to seek assistance from a professional piercer. With proper technique and care, you can safely achieve a stylish septum piercing.
Where To Pierce Your Nose Diagram
A nose piercing diagram shows you exactly where on your nose you can pierce. It’s like a map for your piercing journey! The diagram points out safe and common areas for nose piercings, helping you decide where you want to place your new accessory. Whether you prefer a nostril piercing or something more adventurous like a septum piercing, the diagram guides you with clear visuals so you can make an informed choice. So, if you’re planning to get your nose pierced, a nose piercing diagram is your trusty companion to finding the perfect spot for your new look!
How To Numb Your Nose At Home Without Ice

Numbing your nose at home without ice is simple and effective. One way is to use over-the-counter numbing creams or gels available at pharmacies. These creams contain ingredients like lidocaine or benzocaine, which temporarily block nerve signals in the skin, reducing sensation. Apply a small amount of the numbing cream to the area you want to pierce and wait for it to take effect before proceeding with the piercing.
Alternatively, you can try using a topical anesthetic spray, which works similarly to numbing creams. Spray the anesthetic onto the skin around your nose and wait a few minutes for it to numb the area. Remember to follow the instructions on the product packaging and use caution to avoid getting the numbing agent in your eyes or mouth. With these simple methods, you can numb your nose at home safely and comfortably before piercing.
Can You Pierce Your Own Nose With An Earring
Yes, you can pierce your own nose with an earring, but it’s not recommended. Earrings are not designed for piercing and may not be sharp or sterile enough for the job. Using an earring increases the risk of infection and complications. It’s safer to use a sterilized piercing needle and proper piercing equipment to ensure a clean and successful piercing. If you’re considering piercing your nose, it’s best to consult a professional piercer for expert advice and assistance. Your safety and health should always come first when it comes to body modifications.
I Go Pierce My Nose Song

The “I Go Pierce My Nose” song is a catchy tune that celebrates self-expression through body piercing. It’s a fun and upbeat anthem that encourages individuals to embrace their unique style and make bold fashion choices. With its lively rhythm and playful lyrics, the song inspires confidence and empowerment, reminding listeners that they have the freedom to express themselves however they choose. Whether you’re a fan of body art or simply enjoy a catchy beat, “I Go Pierce My Nose” is sure to lift your spirits and leave you singing along. So crank up the volume, let loose, and dance to the rhythm of self-expression with this infectious song!
What Size Needle For Nose Piercing
When choosing a needle size for a nose piercing, it’s essential to opt for a gauge that’s appropriate for the thickness of your nose cartilage. Typically, a 20 or 18 gauge needle is suitable for nose piercings, as they provide a balance between comfort and durability. However, it’s crucial to consult with a professional piercer or follow manufacturer recommendations to ensure the correct size for your specific piercing needs. Using the right needle size can help minimize pain, reduce healing time, and ensure a successful piercing experience overall.
Nose Piercing With Needle Near Me
Looking for a nose piercing with a needle near you? You can find piercing studios or shops in your area through online directories or by asking for recommendations from friends. Once you’ve located a place, make sure to inquire about their sterilization procedures and the experience of their piercers. Remember to choose a reputable establishment to ensure a safe and hygienic piercing experience. Always prioritize your health and safety when getting any kind of body modification.
FAQ,s
Can you safely pierce your own nose?
Yes, with proper knowledge, tools, and precautions, you can safely pierce your own nose.
Does piercing your nose yourself hurt?
Piercing your nose yourself can cause some discomfort, but the level of pain varies from person to person.
Can I pierce my nose with a hoop?
Yes, you can pierce your nose with a hoop, but it’s essential to ensure the hoop is made of high-quality, hypoallergenic material and that it’s appropriate for initial piercing to minimize the risk of complications.
Are DIY nose piercings safe?
DIY nose piercings can be safe if proper hygiene practices are followed, but it’s essential to proceed with caution and consider seeking professional assistance if unsure.
Conclusion
In conclusion, piercing your own nose can be a thrilling adventure, allowing you to express your individuality and creativity. With the right preparation, technique, and aftercare, DIY nose piercing can be a safe and rewarding experience. However, it’s crucial to prioritize hygiene, use sterile equipment, and be aware of the potential risks involved. If you’re uncertain or uncomfortable with the process, seeking assistance from a licensed piercer is always a viable option.
Remember, patience is key during the healing process, and rushing can lead to complications. Take your time, follow the aftercare instructions diligently, and listen to your body. Your journey doesn’t end once the piercing is done; it’s just the beginning of a new chapter in your self-expression. So, whether you’re adorning yourself with a delicate stud or a bold hoop, wear your nose piercing proudly and embrace the beauty of your uniqueness.