Piercing your own nose can be an exciting venture, but it’s essential to approach it with caution and knowledge. Whether you’re seeking to express your individuality or simply looking to save some money, doing it yourself requires thorough preparation and understanding. In this comprehensive guide, we’ll walk you through the process step by step, ensuring safety and success in your DIY nose piercing journey.
Imagine the satisfaction of adorning your face with a sparkling nose stud that you’ve pierced yourself. With the right guidance and precautions, you can turn this vision into reality. Let’s delve into the intricacies of self-nose piercing and unlock the secrets to achieving a stylish and safe outcome.
Preparation is Key

Before embarking on your nose-piercing endeavor, gather all necessary supplies. You’ll need a sterile needle, piercing jewelry (typically a nose stud or hoop), rubbing alcohol or saline solution, cotton balls or pads, marking pen, and gloves. Ensure that your workspace is clean and well-lit to minimize the risk of contamination.
Choose the Right Spot
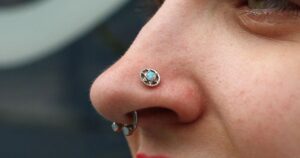
Selecting the correct placement for your nose piercing is crucial. Use a mirror to examine your nose carefully and pinpoint the desired location. Avoid areas with prominent veins or cartilage, as piercing these regions can lead to complications. Typically, the optimal spot for a nose piercing is the nostril’s curve, just above the crease.
H3: Marking Your Target
Once you’ve identified the ideal spot, use a sterile marking pen to outline the piercing area. Take your time and ensure precision, as this will determine the placement of your jewelry. Double-check the alignment by comparing both sides of your nose in the mirror. Remember, accuracy is key to achieving a symmetrical and aesthetically pleasing result.
Numbing the Area
To minimize discomfort during the piercing process, consider numbing the skin with a topical anesthetic. Apply the numbing cream or gel to the marked area and wait for it to take effect. This step can help alleviate pain and make the experience more manageable, especially for those with low pain tolerance.
The Piercing Process

With preparations complete, it’s time to proceed with the piercing itself. Follow these steps carefully to ensure a successful outcome:
Sterilize the Equipment
Before proceeding, sterilize the needle and jewelry by soaking them in rubbing alcohol or boiling water. Ensure that your hands are also clean and sanitized to prevent infections.
Pierce with Precision
Hold the sterilized needle firmly between your thumb and index finger. Take a deep breath to steady your nerves, then gently but firmly push the needle through the marked spot on your nose. Maintain steady pressure until the needle penetrates the skin completely. Expect some discomfort or a brief pinch during this process.
Insert the Jewelry
Once the needle is through, swiftly remove it and replace it with the pre-sterilized nose stud or hoop. Be cautious not to touch the pierced area with your fingers to avoid introducing bacteria. Secure the jewelry in place and ensure it sits comfortably within the piercing.
Can You Pierce Your Own Nose With An Earring
Yes, you can pierce your own nose with an earring, but it’s not recommended. Earrings are typically not designed for nose piercing, so they may not be sterile or sharp enough. Using an earring can increase the risk of infection, improper placement, and complications. It’s safer to use a sterile needle specifically designed for piercing and to seek professional assistance from a licensed piercer for a safe and successful nose piercing experience. Remember, your health and safety should always come first when considering any form of body modification.
Diy Nose Piercing Kit
Looking to add a touch of flair to your appearance? Consider trying a DIY nose piercing kit! These convenient kits come with all the essentials you need to safely and stylishly pierce your nose at home. From sterilized needles to a variety of trendy jewelry options, DIY nose piercing kits make the process easy and accessible for beginners and enthusiasts alike.
With step-by-step instructions and high-quality materials, DIY nose piercing kits offer a cost-effective and convenient alternative to visiting a professional piercer. Whether you’re looking to express your individuality or simply curious about the world of body modification, a DIY nose piercing kit provides everything you need to embark on your piercing journey with confidence.
Where To Pierce Your Nose Diagram
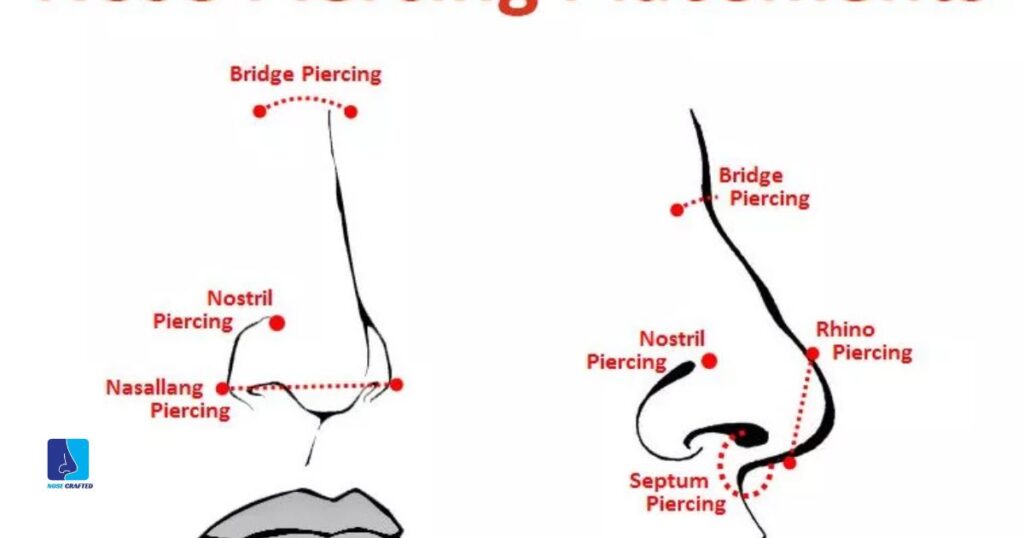
When deciding where to pierce your nose, it’s essential to consider the anatomy of your nose. The diagram shows the recommended placement for a nose piercing, typically on the curve of the nostril, just above where the nose creases. This area is chosen because it’s less likely to hit major blood vessels or cartilage, reducing the risk of complications. Once you’ve carefully chosen the right spot for your piercing, it’s crucial to follow proper care guidelines. Familiarize yourself with the comprehensive Aftercare Instructions to ensure a smooth healing process and minimize the risk of any issues.
By following the guidance provided in the diagram, you can ensure that your nose piercing is placed in a safe and aesthetically pleasing location. Remember to mark the spot carefully and seek professional assistance if you’re unsure about the placement. With the right approach, you can enjoy a stylish and safely pierced nose.
How To Numb Your Nose At Home Without Ice
Numbing your nose at home without ice is possible using simple methods. One way is to apply a numbing cream or gel specifically designed for skin numbing. These creams contain ingredients like lidocaine or benzocaine, which help dull sensation in the skin. You can easily find these over-the-counter products at your local pharmacy or online. Simply follow the instructions on the packaging for safe and effective application.
Another method is to use a cold compress or a frozen vegetable pack wrapped in a cloth. Apply the cold compress to the area you want to numb for a few minutes before attempting any procedure. The cold temperature helps temporarily numb the skin, making it less sensitive to pain. However, be sure not to apply the cold compress directly to the skin for too long, as it may cause frostbite or damage.
FAQ,s
Can you safely pierce your own nose?
Piercing your own nose can be risky and may lead to complications such as infection, improper placement, and nerve damage. It’s generally safer to have a professional piercer perform the procedure.
How do you know where to pierce your nose?
You can determine where to pierce your nose by identifying the area with minimal veins or cartilage, typically near the curve of the nostril.
Are DIY nose piercings safe?
DIY nose piercings can pose risks such as infection and improper placement, making them potentially unsafe.
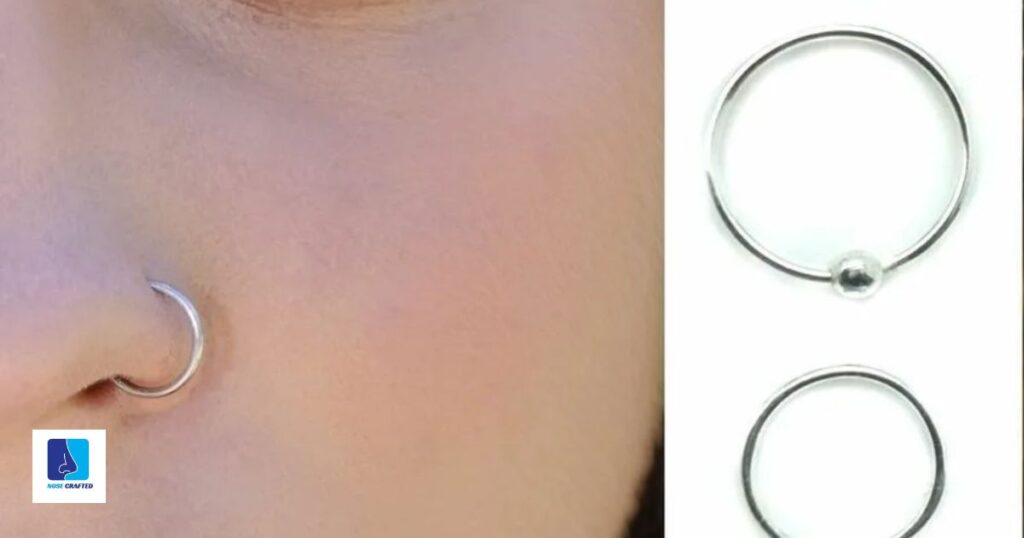
Can I pierce my nose with a hoop?
Yes, you can pierce your nose with a hoop, but it’s essential to ensure proper placement and size to avoid complications.
Conclusion
In conclusion, piercing your own nose can be a thrilling adventure, but it’s important to approach it with caution and care. By following the steps outlined in this guide, you can achieve a stylish and safe outcome. Remember to gather all necessary supplies, choose the right spot for piercing, and numb the area to minimize discomfort. Taking your time and maintaining precision throughout the process is key to a successful DIY nose piercing.
while self-nose piercing is possible, it’s crucial to recognize the risks involved, including infection and improper placement. Seeking assistance from a licensed professional piercer is always recommended for those who are unsure or hesitant about performing the procedure themselves. Additionally, proper aftercare is essential for promoting healing and preventing complications. With patience, preparation, and proper guidance, your DIY nose piercing experience can be both rewarding and memorable.